TeraCota – Terahertz Coating thickness analysis
A Non-Contact, Multi-Layer Coating & Paint Thickness Sensor with Scanning Capability.
 TeraView presents a film thickness gauge designed for the automotive industry.
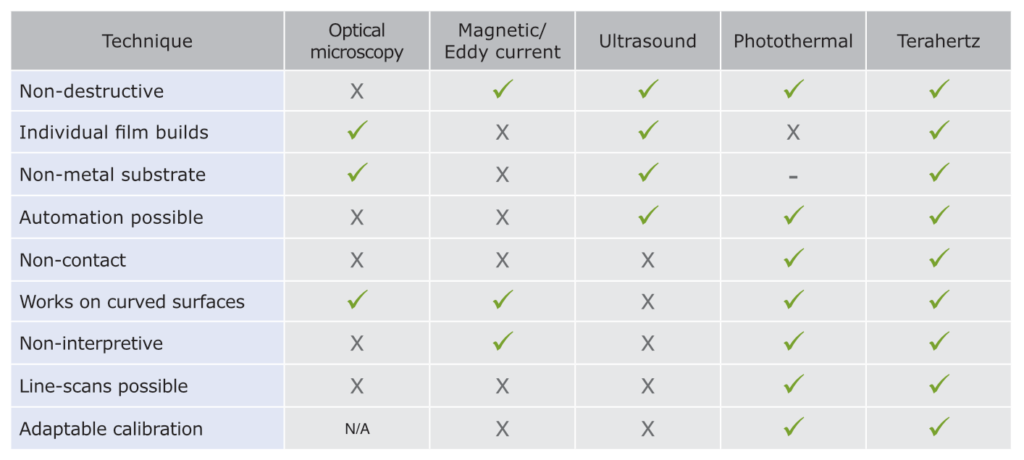
The TeraCota 2000 can determine the individual thickness of multiple paint layers on both metallic and non-metallic substrates and offers significant benefits over existing techniques.
The terahertz sensor is non-contact, suitable for working on curved surfaces and capable of performing horizontal and vertical line scans.
Based on terahertz technology, the sensor represents a significant leap beyond the current method of measurement for quality and process control in automotive paint application, and also provides significant economic and environmental benefits.
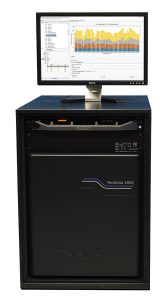
TeraCota 2000
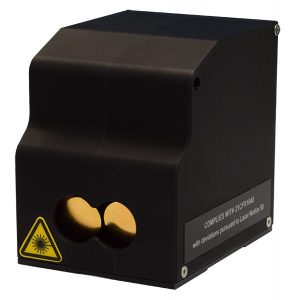
Unit Sensor

Production Features
- Non-contact – no couplant required; operates on flat and curved surfaces, including windshield flanges.
- High accuracy reporting of film thickness.
- Single and dual sensor options.
- Self-calibrating without the expense and time of sending samples to a third party.
- Suitable for wet-on-wet preparations.
- Industrialized form factor; designed for the automotive manufacturing environment.
- Can be integrated with plant IT systems and existing robotic hardware.
- Non-interpretive; automatic layer thickness calculation without operator input.
- Optional vehicle position measurement unit to correct for body position repeatability errors.
Application Areas
Paint Systems
| Application Types | Liquid and powder coatings | wet-on-wet preparations | tri-coats |
| Basecoats | Solid | Pearlescent | Metallic (independent of hiding power) |
| Substrates | Metallic (steel, aluminium, etc.) | non-metallic (plastic, carbon fibre, etc.) |
Measurable Surfaces
| Curvature | Operates on both flat and curved surfaces |
| Accessible areas | Recessed areas, including window flange |
| Temperature range | From ambient to 150 °C (post bake) |
Comparison Table

Technical Specification
Measurement
| Thickness Accuracy* | 1.5 µm |
| Minimum Thickness* | 5 µm |
| Sampled Area | Spot diameter of approximately 2 mm |
| Measurement Time | Typically 4 seconds per point (excluding alignment) |
| Sensor Positioning | Working distance to painted surface of 88 mm (± 0.15 mm) |
| Robot-mounted version requires angular positioning to within ±0.2° of normal incidence |
* typical values; dependent on individual paint type and properties
Environmental
| Dimensions (L×W×H) | Sensor head: 11.5 × 8.8 × 11.3 cm | Core unit: 59 × 55 × 77 cm |
| Rack mount modules | Optics Rack Assembly 4U, Electronics Rack assembly 3U, Processing PC 3U |
| Approx. weight | Sensor head: 1.4 kg | Core unit: 82 kg |
| Extension | Sensor-core separation of up to 15 m |
| Communications | Ethernet connection to fixed IP address on internal PC |
| Power requirements | 110 / 220 V, 20 A line power, earthed, via standard 3-pin connection |
| Operating temperature | 18 °C (64 °F) – 30 °C (86 °F) |
| Operating humidity | 20 – 80%, non-condensing |
